
How to Roast Chestnuts. A step-by-step guide!
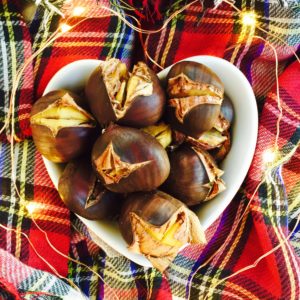
On the first day of Christmas my true love gave to me…chestnuts roasting on an open fire! That’s how the song goes right??!! My favorite Christmas Song!! 😉
This was my first time making chestnuts and I put together a step by step guide for you to follow…(I’m doing the hard work for you and bringing you gluten-free, vegan, health holiday recipes for the future and my #12DaysOfChristmas series)!
Hopefully you won’t make the same mistakes I did…
Hey, I’m honest! I will be as transparent as I can with my with my healthy happy journey! I still managed to get some tasty chestnuts and some cute holiday pictures so I’m happy with that! It was fun to try something new and next time will be better 🙂
Chestnuts have a slightly sweet, nutty and soft floral aroma and flavor, while somehow also being savory. The texture is softer and more tender than other nuts.
I also want to share with you some health benefits of chestnuts…I had no idea they were lower in fat than other nuts and higher in carbohydrates and I love that! Here are few more…
Health Benefits of Chestnuts
- Chestnuts are lower in fat and calories than other nuts and higher in complex carbs which will give you a boost of energy without weighing you down. (Great for us hclf vegans).
- Chestnuts are high in minerals like iron, copper, calcium, magnesium, manganese, phosphorus, zing and potasium.
- Chestnuts have a good amount of brain boosting B vitamins especially B6 and folate!
- Good source of fiber, protein and healthy Omegas (3 &6).
How to Oven Roast Chestnuts – Step by Step
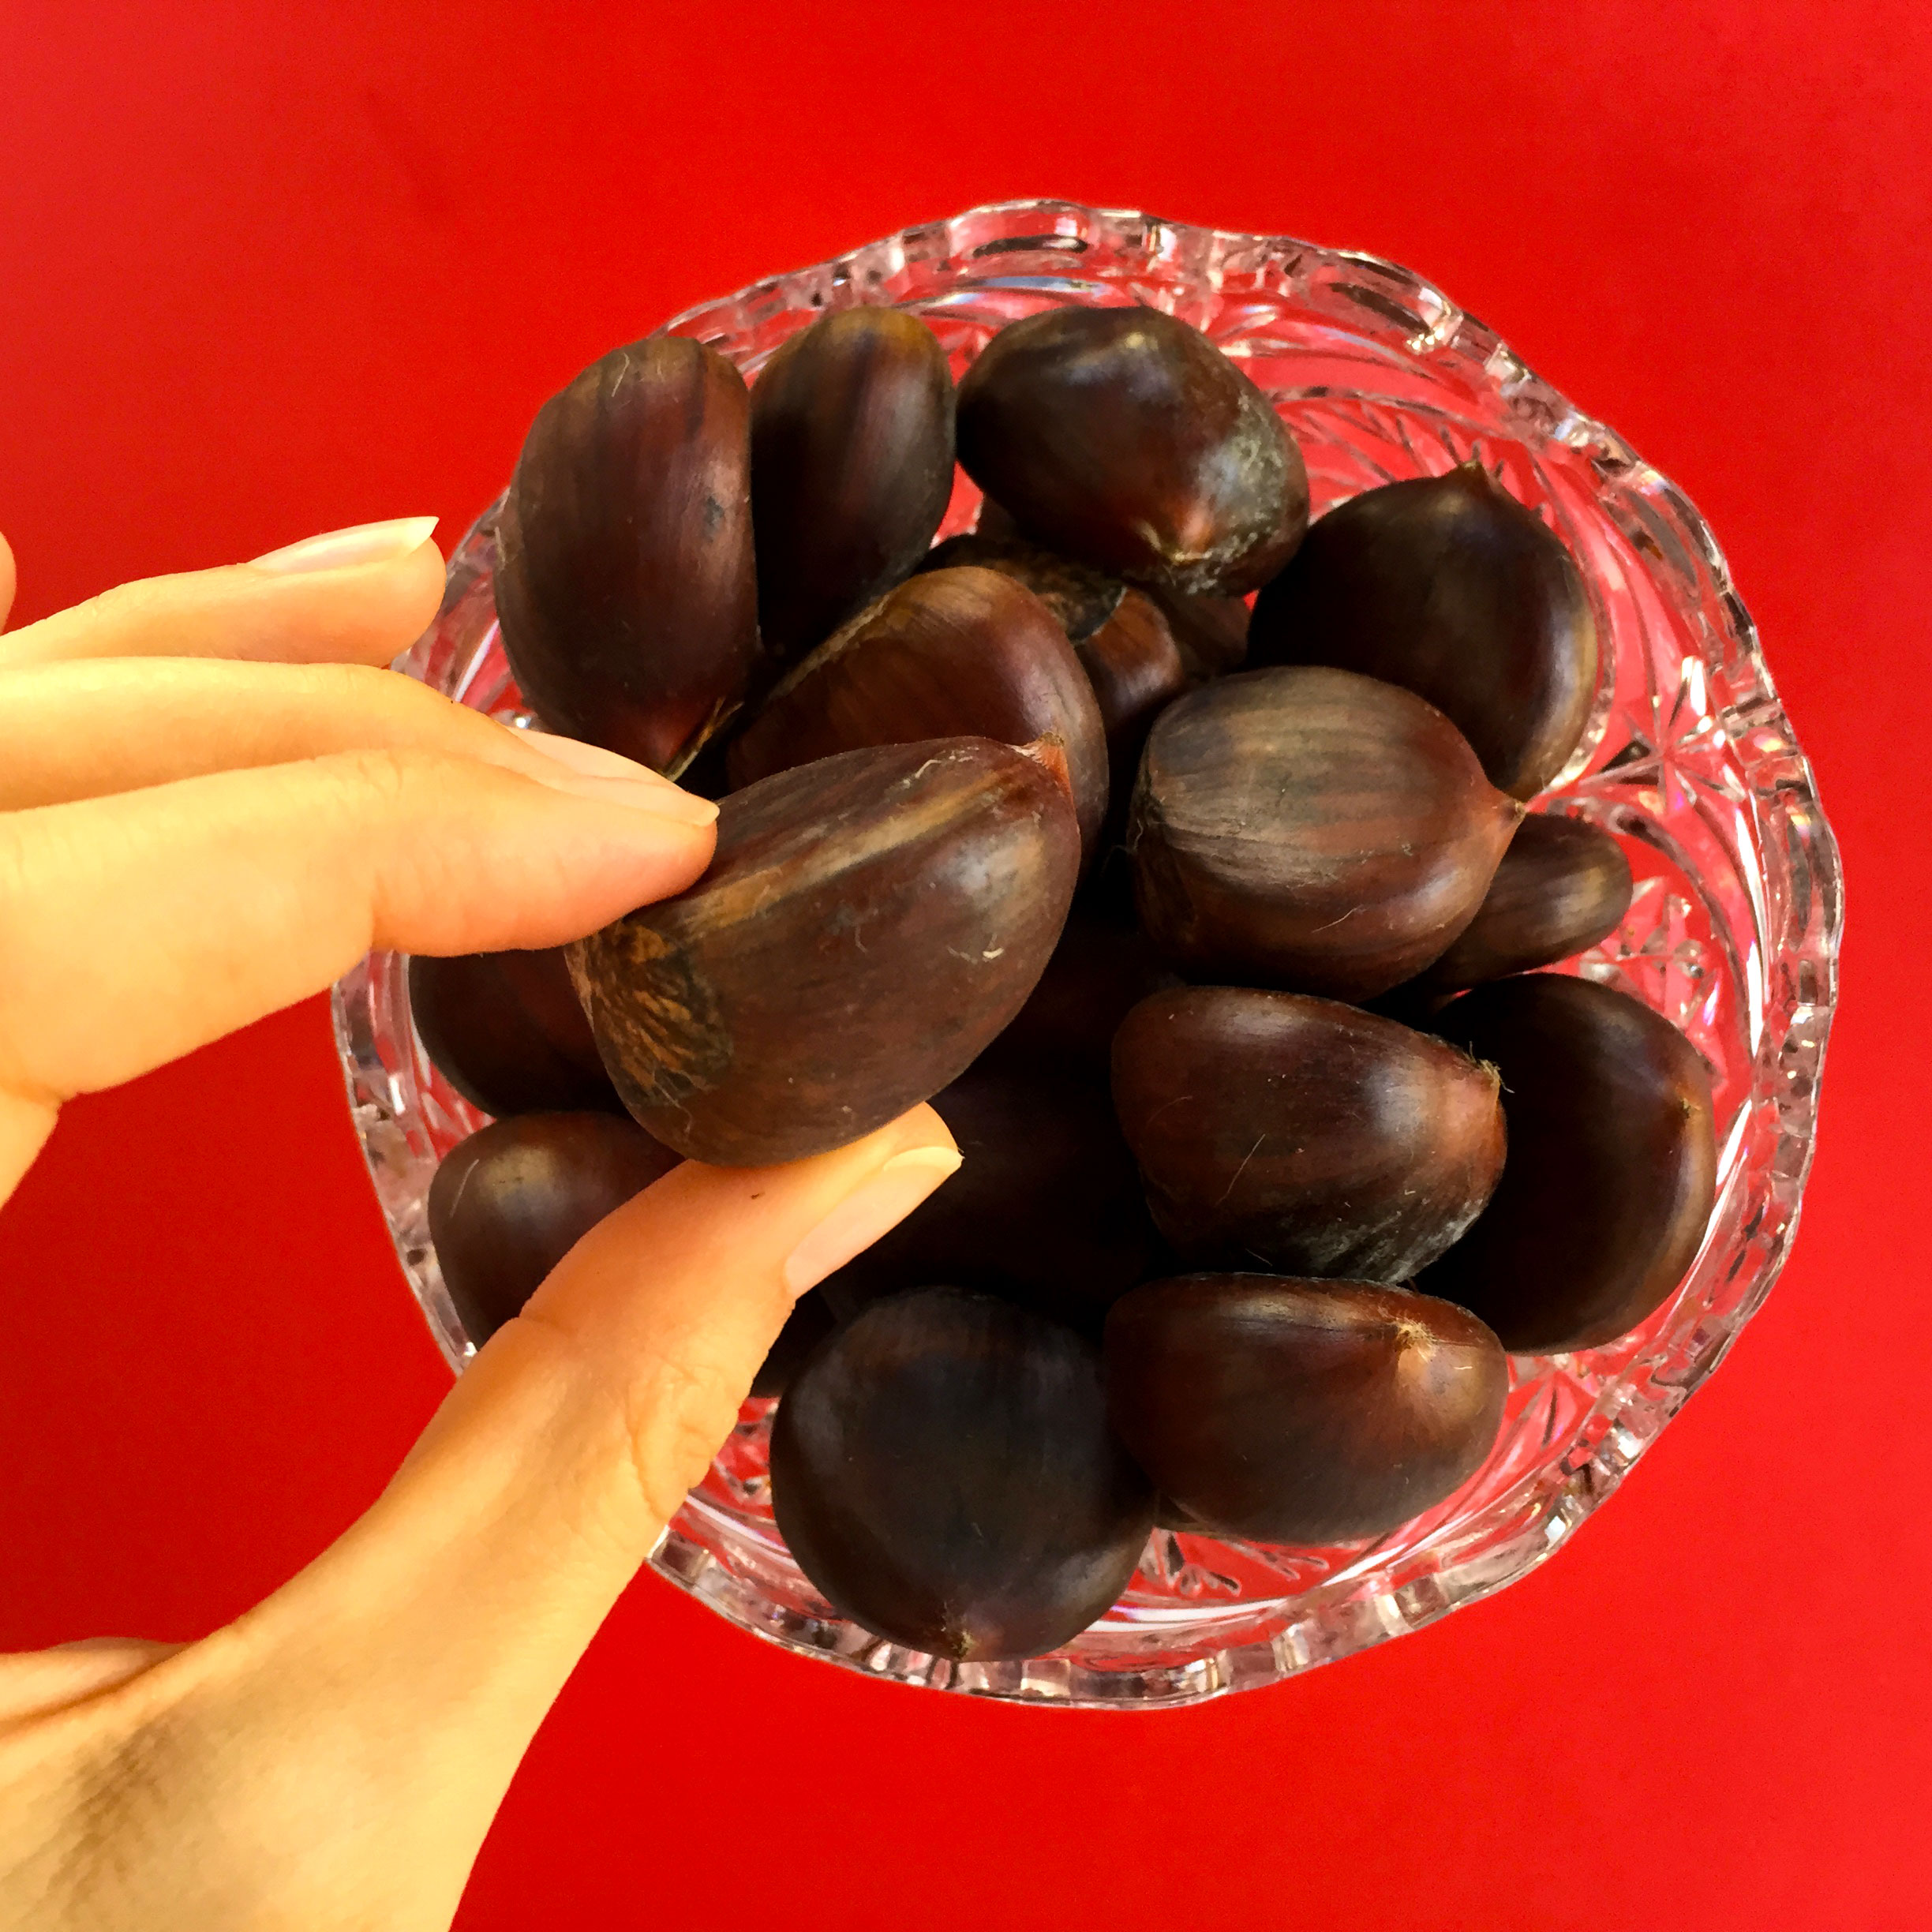
- I picked up about a pound of Chestnuts – one note- you may want to buy more than you think you need because some of them are bad and you will end up with less than you thought.
- This process requires your full attention if you want a beautiful end result, if you were like me, and slacked here and there they will not be as easy to peel etc.
- Preheat oven to 425f.

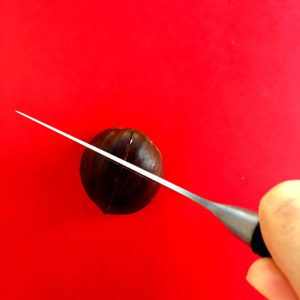
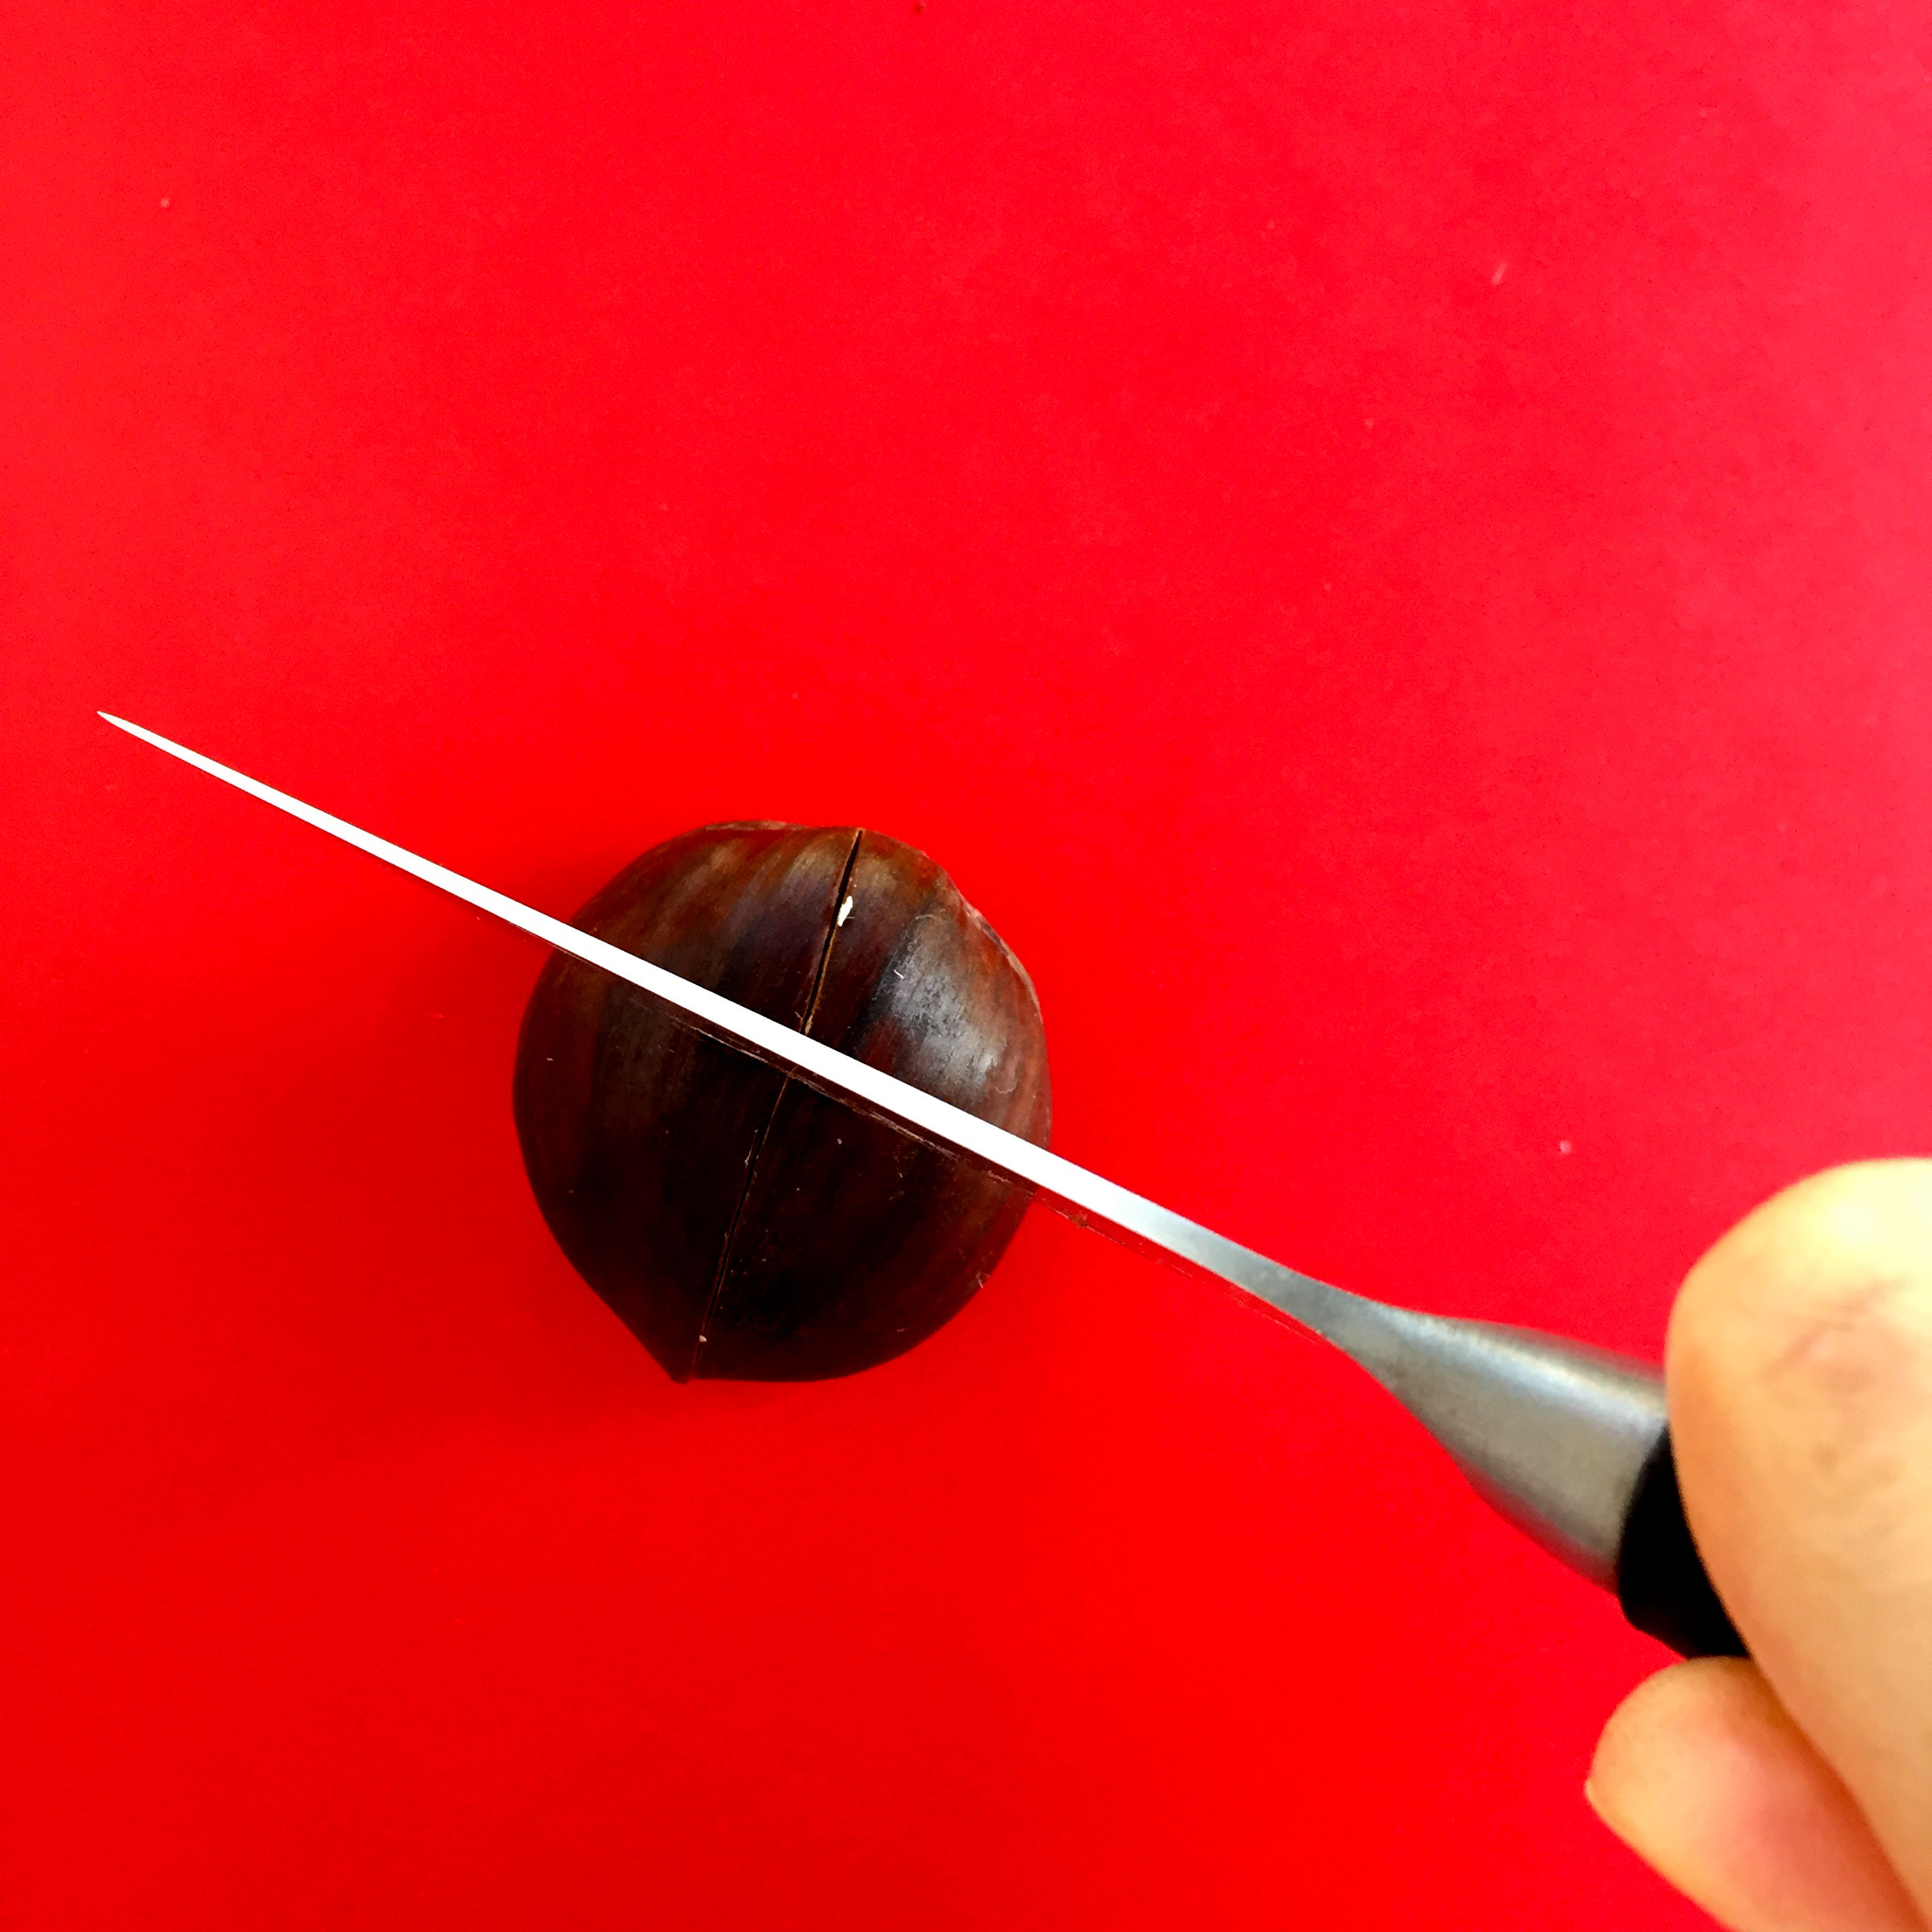
- Place each chestnut down on it’s flat side and perforate a slice on the round part, you can do an x shape. You want to make sure you go through the tough brown skin. This is very important because you must create a place for steam to come through, otherwise they can pop! I went a little overboard with the slicing because I wanted to make sure I would be able to peel them. I don’t recommend going as deep as I did if you want a “pretty” end result.
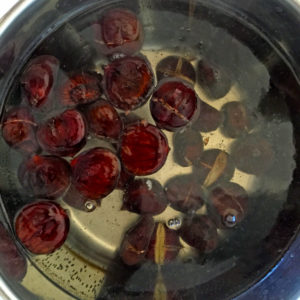
- Place chestnuts in a saucepan of water and bring to a boil. This is where I messed up. If you are going to boil them before baking them, you must put them in the cold water, bring to a boil, and remove immediately once they start to boil. You don’t want to over cook them. I let them boil a little too long. You don’t have to boil them at all, but I read they come out more tender and evenly cooked, it’s up to you.
- Immediately place on your cookie sheet and bake for 15-20 mins.
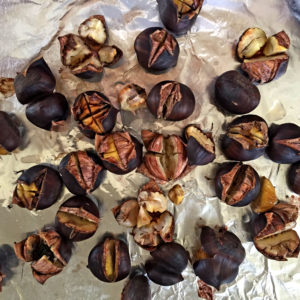
- Once they are done baking place them in a bowl with wrapped in a towel for about 15 minutes to cool and further steam.
- You want to make sure they are still warm when you peel them, otherwise, it is very hard to peel them. You want to peel the tough hard shell as well as the inner brown skin. I waited too long and it was so hard to peel! A nut cracker may have helped…
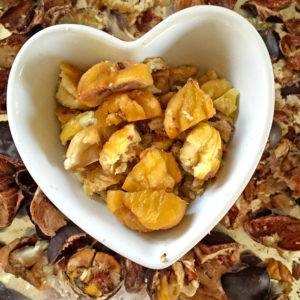
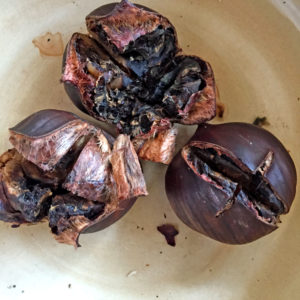
Not so pretty peeled chestnuts - You will notice some of the chestnuts are black or brown inside, those ones have gone bad, just toss them away. Place all the peeled chestnuts in a separate bowl and enjoy!!


See you tomorrow for day two ♥
